Transform your apartment into a yeast lab, and have fun doing it!
Grad Admissions Blog | Veda K.
October 22, 2020
When the pandemic-that-shall-not-be-named abruptly separated me from my work this March, I threatened to bring the lab home. Unsurprisingly, my roommates were far from enthused at the idea of me culturing human pathogens in our garage. Somewhere in-between trying to bribe them with beer and baked goods I realized I could turn my scientific focus on an organism far more delicious than MRSA[2]: yeast!
Yeast, the tiny organism so miraculous that it was known as “godisgoode” in the days before microscopes were invented, is behind the magical transformations that give us beer, wine, sourdough, doughnuts, kombucha — you name it. In our technological times, it is tempting to relegate the study of microbes to sterile, fluorescently-lit, strictly controlled labs where the genetically engineered organisms you order off the internet live pampered lives. In quarantine in my own home, I re-discovered a centuries-old truth: yeast will appear and grow anywhere. Like any good pet, yeast are largely well-behaved and will sit, stand, and shake your hand on command. Disclaimer: they may also bubble over and stain your carpet in unsavory ways.
With a bit of intuition and a lot of patience, you too can transform any apartment into a lab to grow your pet yeast in!
The kitchen: your new bench
Sourdough: needy but delicious
Growing your own sourdough starter is a relatively low-effort process that is not only ridiculously easy, it also lends you serious kitchen clout. All you need to get started are flour, water, and the right temperature. Combine the flour and water in equal quantities in a container with quite a bit of headspace. “Feed” your starter once a day by replacing half of it by weight with a fresh water-flour mixture. Grow your starter at 68-75F. In the cold of the winter, yeast will take longer to grow and consume the complex nutrients in flour. In the summer, your starter may be so active it requires “feeding” twice a day!

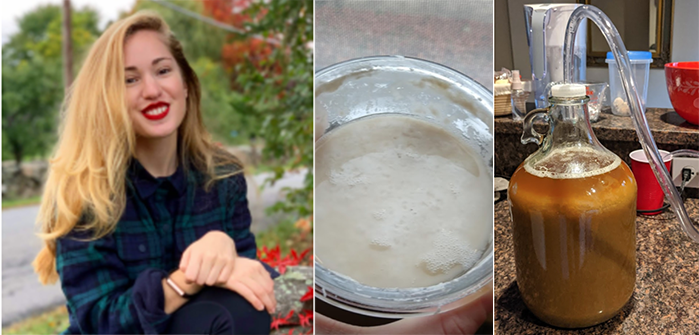
A young starter with “hooch” on top
As the complex community develops in your starter, it will go from being watery (the liquid on top is actually called “hooch”, if that is any indication of its actual nature) and frankly pretty stinky to bubbly and aromatic. Your nose and eyes are your best tools for judging what bugs are living in your starter (move over, Illumina[3]!). Fuzzy and white? Probably mould! Orange and cheesey? Serratia marcescens is likely the culprit. Simply use a clean spoon to remove these offending species. The wonderful magic of your starter is that, as a living community of wild yeasts and bacteria, it will eventually fend off nastier invaders and reach a set-point of well-behaved yeast. Patience is crucial! Keep feeding, and believe in “godisgoode”.
As a microbiologist, I must admit that the process of developing a working starter far outweighed the actual bread-baking process. For those of you who are excited about baking – the starter can be used for pancakes, doughnuts, muffins, cake, almost any dessert that uses dry active yeast. When you need a break from your prolific baking streak, simply pop your starter in the freezer and it’ll be ready for the next time you get hungry!
Beer: hurry up and wait
Over our many weeks in confinement, my roommates and I have been refining our beer-tasting palates by attending Lamplighter Brewery’s virtual tasting events. The wonderful folks at lamp gave me my first introduction to how beer is made and, eager to fill my weekends with more than just existential dread, I decided to venture into brewing.
To be completely honest, I’d also been missing those $6 pitchers of High Life at the Muddy (the Muddy Charles Pub, a campus highlight).

Like baking, brewing is a process that has engendered a cult-following. Homebrewers take their craft seriously, and you can find countless blog posts and youtube videos describing everything from sanitization techniques to pitch rates (how much yeast goes in) to heated debates on hop flavor profiles. To an MIT grad student, drinking from this “firehose” of information should feel almost comfortable, if you can withstand the flashbacks to 7.51 (principles of biochemical analysis). The trick, I’ve learned, is to dive in headfirst and take in specific pieces of information only as needed.
Brewing requires a little more investment than baking. The equipment you need will likely not be lying around the house, and unfortunately cannot be repurposed for much if you find that brewing isn’t quite your thing. The good news is that there are several companies selling pre-assembled “kits” to get you started on your boozy journey. After doing some research of my own, and soliciting advice from my homebrewer friends, I went with an IPA kit that included most of the hardware I’d need.
My first (and only, so far) brew day was a 6-hour process. Like any experiment in the lab, I anxiously sanitized, scrubbed, stirred, heated and cooled alternately. The day after, I realized my hyper-aware level of caution had been superfluous – my yeast were happily bubbling away in their preferred temperature range of 68F-75F. Little did I know that they’d still be bubbling away two weeks later at 91F (!!), thanks to the heat of a Boston summer and a failed condenser in our central AC.
The garage: your new incubator / engineering lab

Once your beer has been brewed, it needs to ferment in a cool, dark place for two weeks. The only cool, dark place in our now very hot apartment is our garage, which has been taken over by my MechE roomie (hey Annie!) Annie, not constrained by a study of deadly bacteria, was uninhibited in her assembly of a mini-engineering lab in our garage, even having equipment sent directly to our apartment! My yeast and fermenting beer join her assorted selection of wires in filling the void in our hearts normally filled by our labs.
Sourdough starter fed and beer bottled, all that is left to do is wait. In between waiting for bread and booze, I like to sneak in some studying for my upcoming qualifying exams!
As we become ever more intimately acquainted with our homes and the yeast that inhabit them, I highly encourage you to experience the magic of micro-organismal life for yourself. Biting into that first slice of bread or taking your first sip of home-brewed beer is a fulfilling reminder that, but for the pardoning mercy of an only 99.99% effective clorox wipe, our sterile world would be dull and flat. Grant yourself a moment to breathe and celebrate the 0.01% of microbes that make our world wonderful — you’ll be back in the lab in no time!
[1] Biosafety level 2 (BSL-2)refers to laboratories that work with biological agents that pose a moderate health hazard
[2] Methicillin-Resistant Staphylococcus Aureus (MRSA) is a form of antibiotic resistant bacteria that causes infections
[3] Illumina is a DNA sequencing company that is well known for its technology